Build a GUI calculator app using Ruby w/ Tk — Part 1
In this week’s blog, we will take a look at the Tk (ToolKit) gem for Ruby, some of its fundamentals, and build a simple GUI calculator app with it next week. The Tk library is not specific to Ruby and can be found with other languages such as Python and JavaScript.

To install Tk for Mac, first go to ActiveState’s tcl download page and download the ActiveTcl 8.6, you might be asked to create an account first, which is completely free. After the file is finished downloading, following the guide of the installation wizard.

To install the Tk gem for Ruby, run gem install tk on your Terminal. Afterwards if you run gem list, you should see tk.
And to load in the gem, simply include this line on your Ruby file: require ‘tk’ and we are ready to go.

In the world of Tk, everything is a widget (button, label, check button, text entry field, etc). Widgets have common properties such as height, width, background color, border, and they also have widget specific properties like a button can be pressed, a check button can be checked or unchecked. After a widget is created (and possibly given some properties), you then place it onto the interface, this interface can be another widget. And repeat this process.
Let’s see how this works in practice. Start by creating a folder named ruby-gui-app, inside of it, create a file called intro.rb. We will create a simple Window with a title, and specify its height and width.

On line 3, we create a main or root Window and give it a title, paddings on both x and y axis. Then on line 5, we start the main event loop by calling the Tk.mainloop function. Notice this is the bare minimum to set up a Tk program. If you leave out line 3, the program would still run, but it would not have a title; And if you leave out line 5, the program would run then immediately closes the window after execution is completed.
The three properties that we gave to root are all optional, we will explore more common and widget specific properties as we move on.
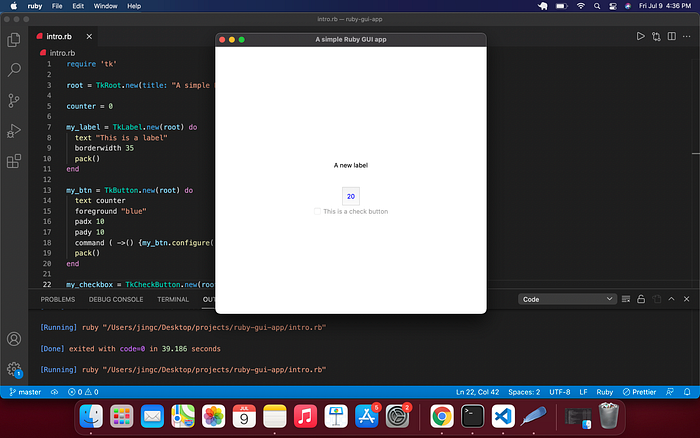
Let’s create a label, button, and a check button, give each some properties, and put them all onto the root widget.
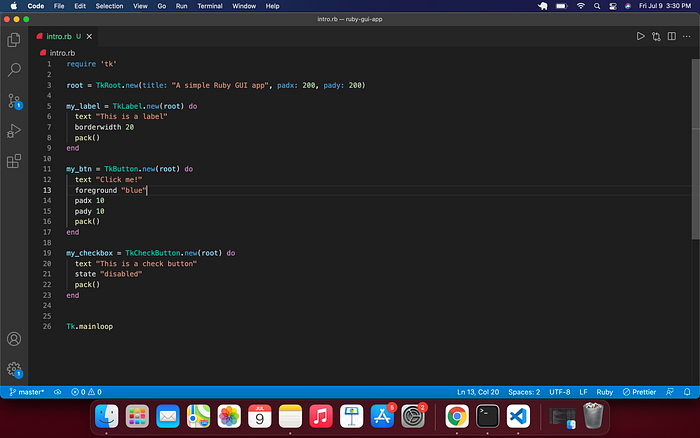
As you can see, creating widgets is fairly straightforward: calling the new method on each class. I’ve also assign them to a variable which is not required and set each one with a few properties. Text is a standard property which will display a string of text inside the widget; borderwidth sets the border area between the widget and other widgets on top, left, right, and bottom; foreground specifies the foreground color of the widget; padx and pady are similiar to width and height in HTML5, they make the widget take up that much horizontal and vertical spaces.
On line 21, we have widget specific property state for our check button, and it’s set to disabled. Only certain widgets like button, radio button and check button can have a state property.
After we create each widget, we pack them onto the root Window. If we run our program now, the widgets will be placed in the order they’re packed.
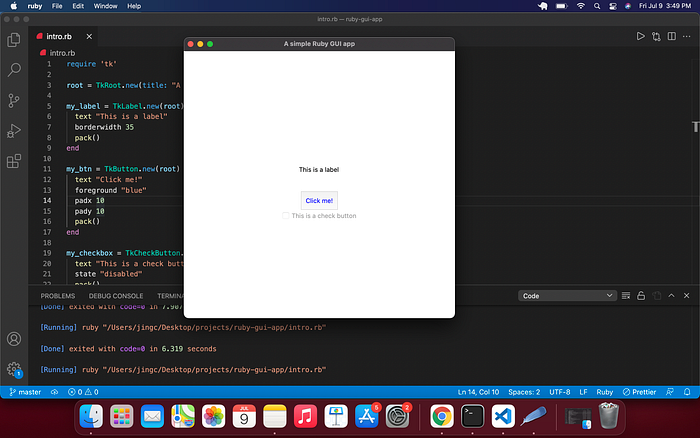
Since we have set the state of the check button to disabled, we won’t be able to check or uncheck it at this time. If you click on the button, nothing happens because we have not bind any functionality to it yet.
In order to retrieve the current value for a property, we can use the configure or cget methods, this is where having a variable assigned to a widget comes in handy.
For example, to get the text value for our label widget, which is named my_label, we can do:
my_label.configure(‘text’) or my_label.cget(‘text’)
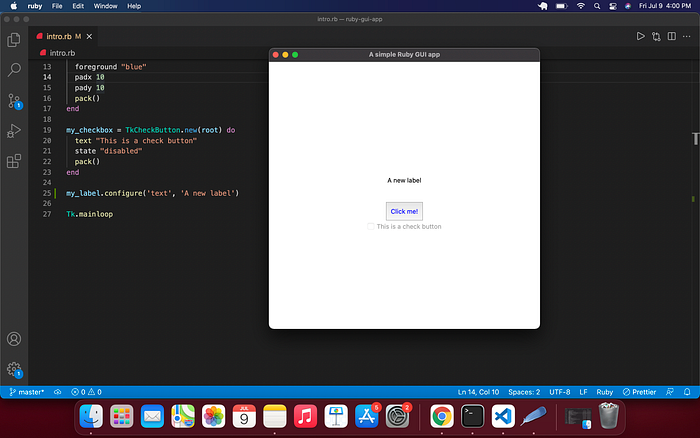
The configure method can also be used to set a new value to a property. If we were to change the text property for my_label from “This is a label” to “A new label”, we can do something like:
my_label.configure(‘text’, ‘A new label’)
In order to have an event of some kind (mouse click, mouse release, key press) associated with a widget, and to perform some action when the said event fires off, we can use the command property. We can pass it a proc or lambda.
Let’s say we want our button to display a number, and every time we click on it, it would increase by 1. First we would define a counter variable and set it to zero. Next, instead of displaying a string for the text property, we can set it to the counter variable in our button:

So far so good, the last thing we need to implement is a command property for the button.
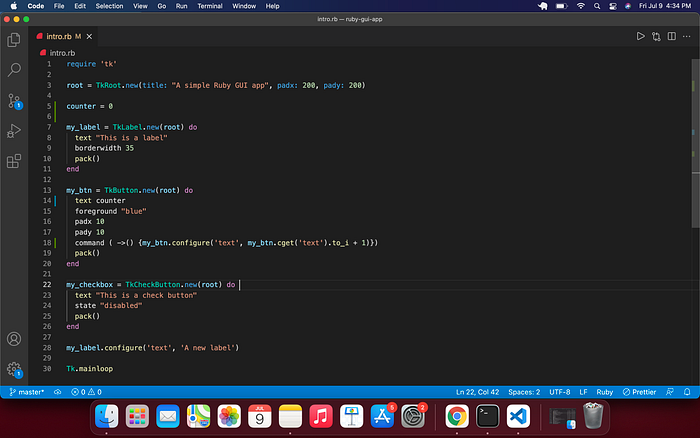
I’ve used a lambda arrow function here, but a proc would work as well. The configure function takes in 2 arguments, the first is the property you want to set, and the second is the new value, in this case, we grab the value with cget and convert it to a number, and increment it by 1.
Feel free to explore the other widgets, their properties on your own. The finished code for today’s blog can be downloaded here. We will continue next week and build out the calculator app with what we learned today! See you next week!