Build a GUI calculator app using Ruby w/ Tk — Part 2
We will continue where we left off from last week and build out our GUI calculator app in Ruby. Let’s create a calculator.rb file in our project folder, and load in the tk library, as well as create a Root widget like so:

Previously we used pack() to place the widgets onto the user interface, but as we create more widgets, we will need a better placement system to arrange our widgets.
In the world of Tk, we also have the grid() to complement pack(). Think of grid as a table system, where we have rows and columns. We can place the first widget in the first row (row zero), first column (column zero); the second widget in first row, second column; the third widget on second row, first column (row one and column zero), and so on. Keep in mind that a widget can also take up (span across) more than one row or column, we just need to give it a rowspan or columnspan value.
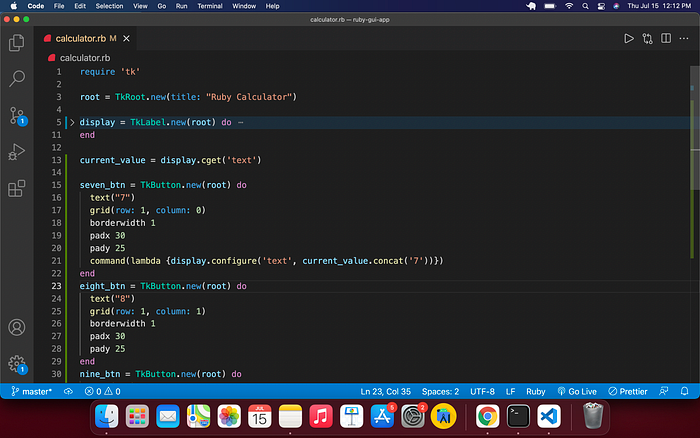
Let’s first create a label which we will use to display the numbers a user puts in to do math operations on row zero and column zero:

In addition to a background color of gray, a specific height and width, on line 10, instead of pack(), we use grid() to place this widget. The label will span 4 columns, as we will have four columns of buttons underneath it. This will make more sense as we build our app. The label is assigned a variable name of display, which is significant as we need a way to reference and manipulate the text property later on.
Let’s now create the first row of buttons, which consist of the numeric values of 7, 8, 9, and multiply button:

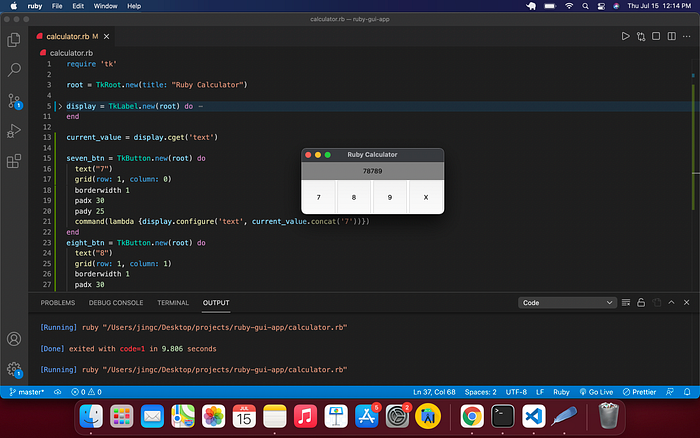
I have assigned each button to a variable name, a text property which shows the numeric value associated to it, some padding and border, and more importantly, they are placed on row one, columns zero to three. If we run the program now, this is what it looks like:

As expected, the label is on top, spanning four columns, and on the bottom, we have a row of four buttons.
Next, let’s implement the functionality of a button when we click it. The logic is, when a numeric button is clicked, we append its value to the end of whatever value is already on display. Then if another numeric button is clicked, we do the same.
We will create a variable called current_value and assign it to display.cget(‘text’). For each numeric button, we can use the command property and pass onto a lambda which concatenates the current_value with the numeric value of whichever button is clicked:
Let’s do the same for the 8 and 9 buttons. We will come back to the multiply button later on. If you run the program now and click on 7, 8, or 9, you should see the value appends to the end of the number successfully.
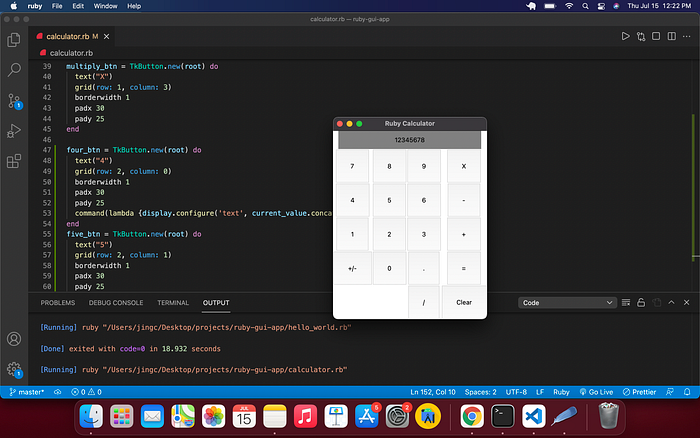
For the second row, go ahead and put 4, 5, 6, and the minus button. The third row will have 1, 2, 3 and the plus button. Fourth row is +/- (negative or positive a number) button, 0, . (decimal), and the equals buttons. And finally the fifth row is the division and clear screen button. Don’t worry about adding commands for non-numeric buttons for now.
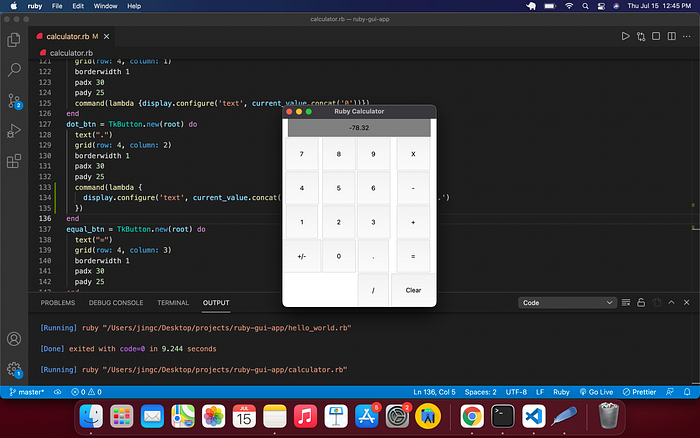
If you’ve done everything correctly, this is what you should see:
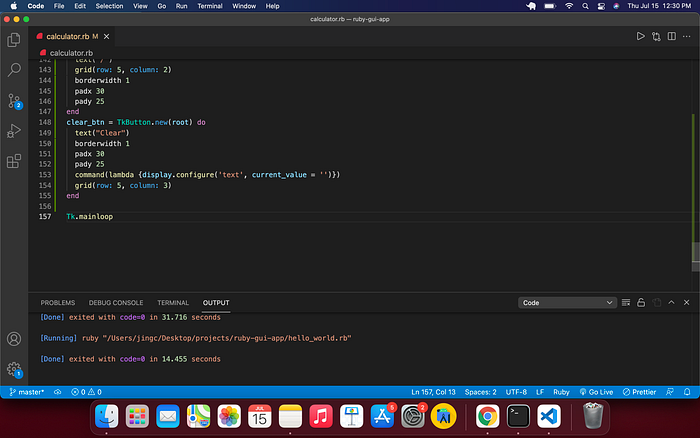
It would be nice if we can clear the input from the display, so let’s work on the clear button first. If you think about it, all the button does is configure the text property of display to an empty string, and set the current_value to an empty string:
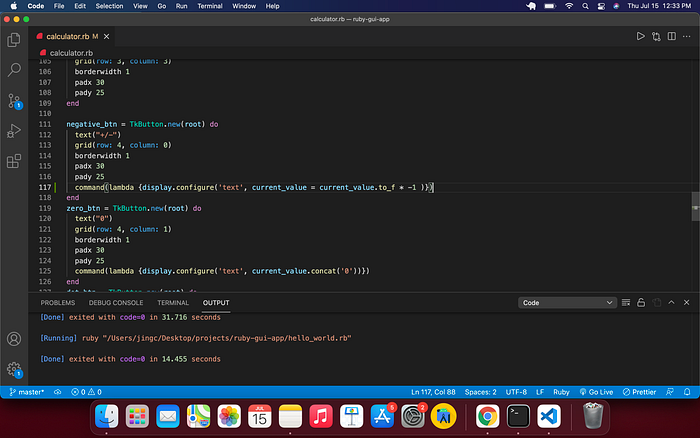
The negative (+/-) button’s functionality is taking the current value, and multiply -1 (negative 1) to it. So if it’s a positive number, after the operation, it will be negative, and vice versa. Keep in mind current_value is a string, so we will need to convert it to an integer or float first:
The . (dot) button is a bit tricky, because if a number already has a decimal point, we cannot add another decimal point to it. You might be tempted to call is_a?(Float) on current_value, but keep in mind current_value is a string.

We check if current_value already includes a dot, if it doesn’t, we can safely append a dot to it.
At this point we are ready to add the arithmetic operations. If you take a moment to think about how the math operations work for humans: we have a number, an operator, and a second number, then a result based on the operation. And to translate the steps into code:
- User enters the first number, which is stored in current_value
- User clicks an operator, the screen clears, current_value is stored in a temporary_variable, the operator (plus, minus, multiply, divide) is stored in a variable operation_variable, and the display is ready for the user to enter the second number
- User enters the second number, which is again stored in current_value
- User clicks the equals operator, depending on the operation_variable, temporary_variable (the first number) is operated onto current_value (the second number), the result is then shown on display
Let’s create the variables and constant first.

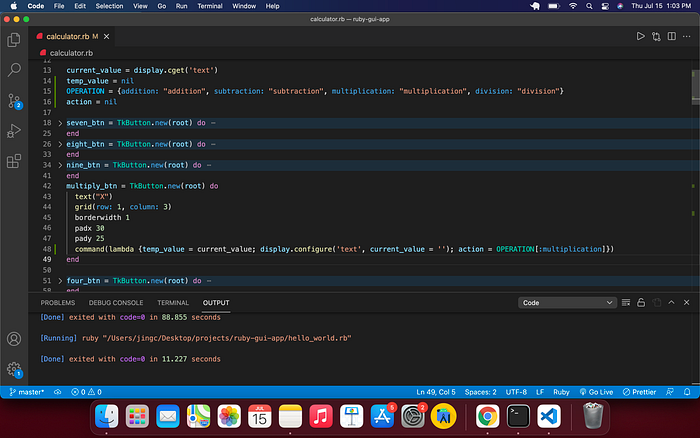
On line 14, we created a temp_value, which will be used to store the first number the user enters. We will need a way to know which operator the user clicks on, on lines 15 and 16, we make sure of a hash named OPERATION, and an action variable.
For the plus, minus, multiply and divide buttons’ commands, all we have to do now is assign the temp_value to current_value, reset the current_value, clear the display, action variable to its corresponding OPERATION value:
Do the same for the minus, plus and divide buttons. Finally we are at the equals button:

Depending on what the action variable is, we will perform different arithmetic operations:
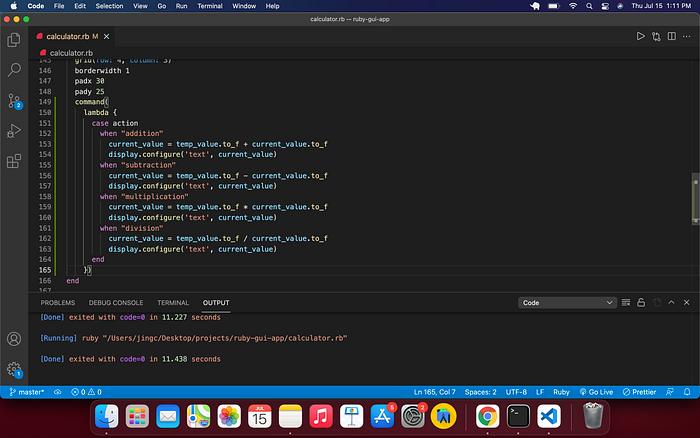
It’s vital to keep in mind current_value is a string, and temp_value will also be string as it’s assigned to current_value. I’ve chose to convert them into a float, since integer divisions sometimes yield an integer, and that might or might not be the desired result. Run the program now to test out a few operations:
The finished code can be downloaded at my Github page. Try to add a few buttons and operations on your own. Next week we will dive deeper into Tk and build a photo album app! Stay tuned!